Looking to buy Ethereum (ETH) but not sure where to start? In this step-by-step guide, we walk you through the process in an easily digestible way.
For this article’s purpose, we’ve selected Coinbase as the exchange. We chose Coinbase for a number of reasons, one of which being that it is one of the most secure cryptocurrency exchanges.
To begin the Ethereum purchasing process, start by setting up your Coinbase account. If you’ve already signed up for the exchange, continue to the first step.
If not, click here for a step-by-step guide on the Coinbase signup process. Once you’ve set up your account, you’re ready to buy! First, log in to your Coinbase account. Next, follow along with the steps below.
1. Buy Ethereum (ETH) Now
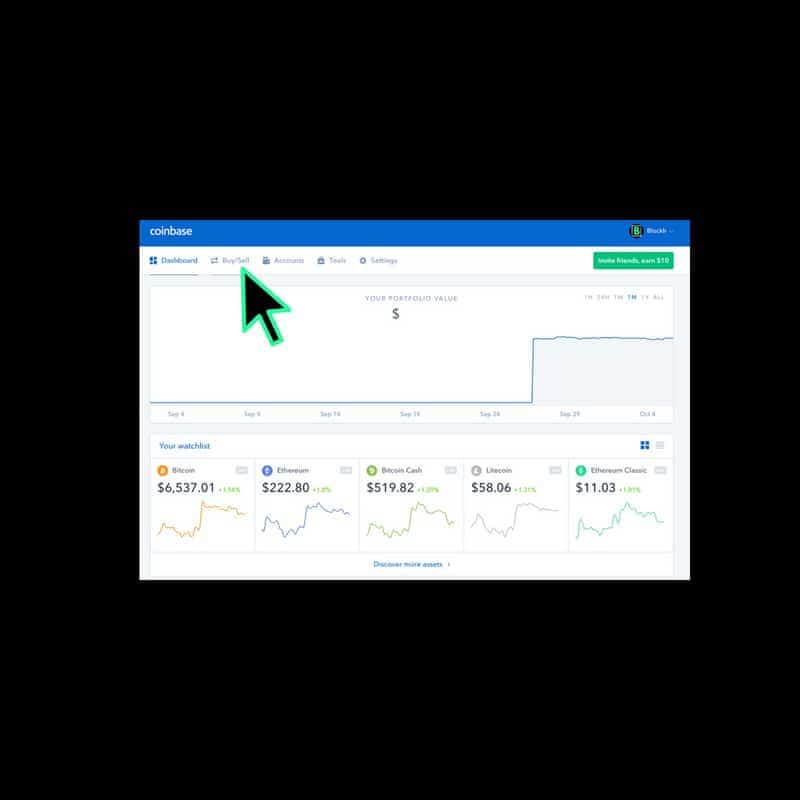
When you log in to your Coinbase account, you will arrive on your dashboard. The top of your dashboard will show your portfolio value. If this is your first purchase, there will be no value indicated in this section.
The bottom of your dashboard will display real-time prices for the five cryptocurrencies supported by Coinbase: Bitcoin, Bitcoin Cash, Ethereum, Ethereum Classic, and Litecoin.
In the top left of your dashboard, you will find a number of tabs including dashboard, buy/sell, account, tools, and settings. To proceed, select the “Buy/Sell” tab.
2. Select Ethereum and Pick Your Payment Method
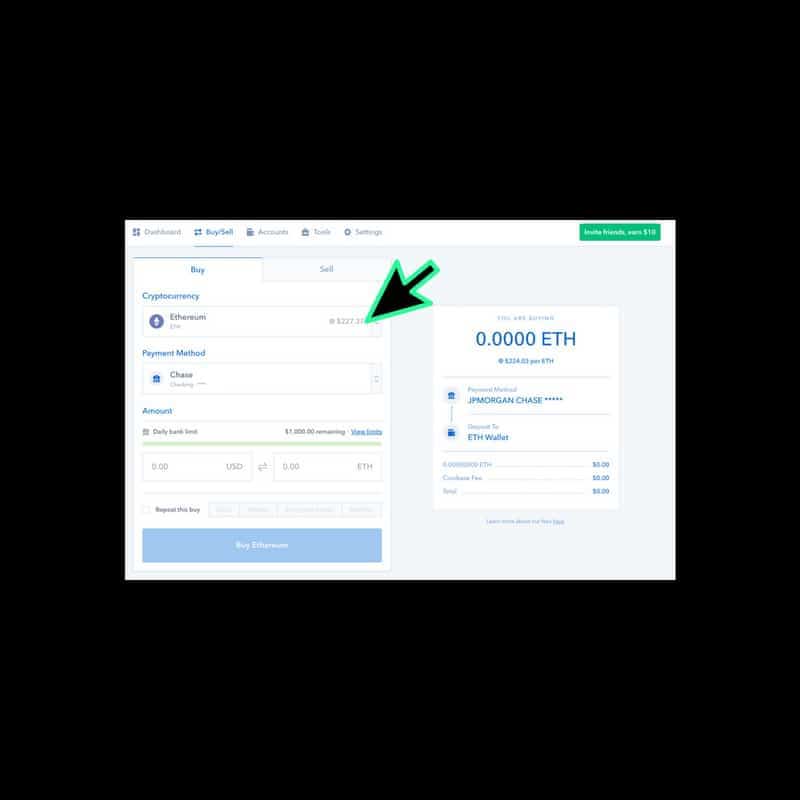
Once you arrive on the buy/sell tab, you will automatically land on the “Buy” section. Firstly, select which cryptocurrency you’d like to purchase. In this case, use the drop-down menu to select Ethereum.
Though you don’t have to purchase an entire Ethereum coin, this will show you exactly how much one coin will cost in USD. Once you’ve selected Ethereum, move onto the “Payment Method” drop-down.
During your account setup, you will have linked your banking account(s) to your Coinbase. During this step, you will select which account you would like to use for your transaction if you’ve linked more than one. Next, move to the “Amount” step below.
3. How Much ETH Do You Want to Buy?
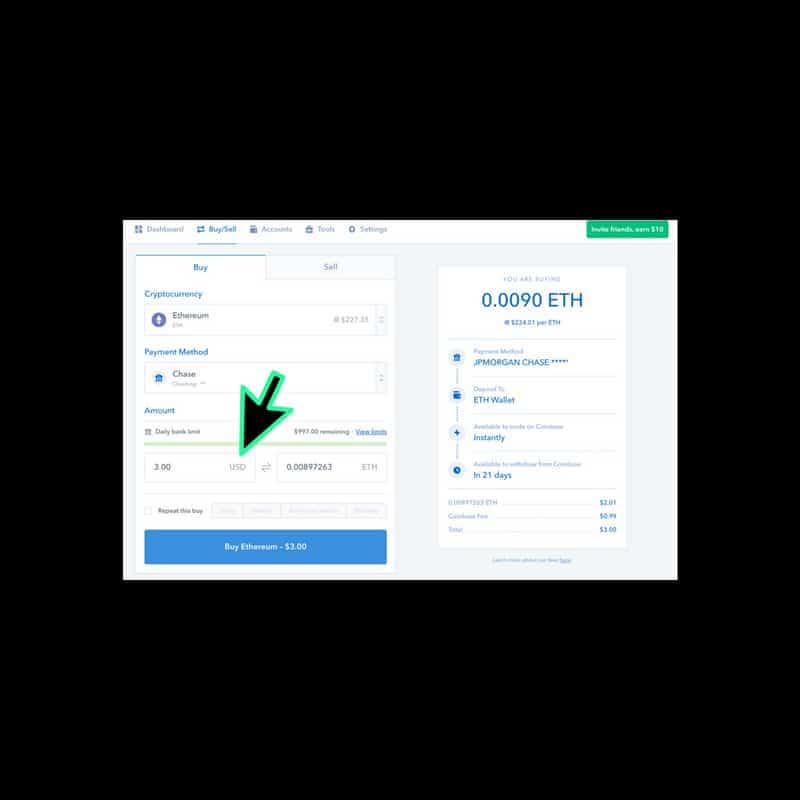
Now is the time to decide how much USD you would like to invest in Ethereum. You can pick any amount you would like. Once you enter the dollar value in USD, a calculation will automatically occur to display the amount your investment equates to in Ethereum (ETH).
When you’ve completed this step, check all of the information to ensure it is accurate and that you are comfortable with your transaction. If everything looks good, click “Buy Ethereum.”
4. Confirm Your ETH Transaction
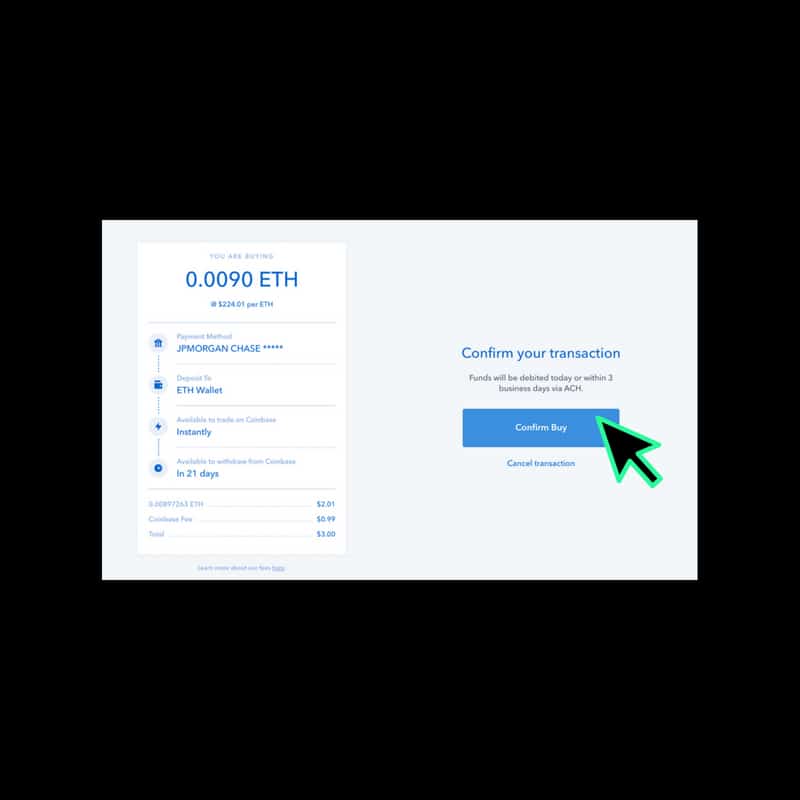
A box will appear asking you to confirm your purchase. Before doing so, carefully review the information to the left of the confirmation button. The information you will see includes:
- Your payment method
- Where your ETH will be deposited. Note: it will automatically be deposited to your Coinbase ETH wallet
- When your funds will be available to trade on Coinbase
- When your funds will be available to withdraw from Coinbase
Once you’ve reviewed the information provided and you are ready to proceed, click “Confirm Buy” to purchase your Ethereum.
5. Await Your Ethereum Purchase Confirmation
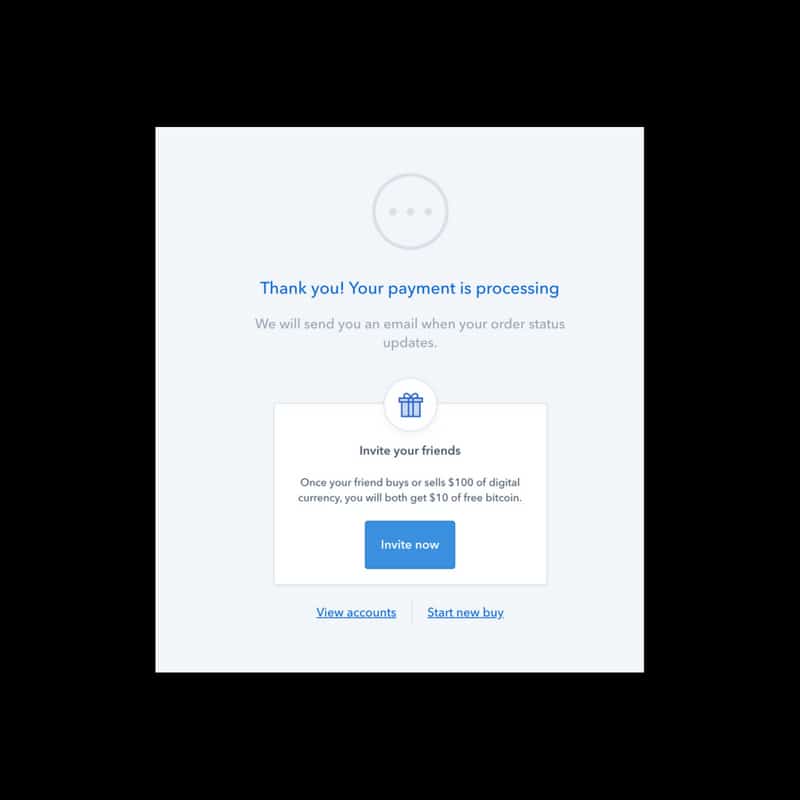
Once you’ve confirmed your Ethereum purchase, you will be notified that your payment is processing. When your payment has processed, you will receive an email of confirmation which includes all of your transaction details. In the meantime, Coinbase will encourage you to invite your friends to Coinbase so you can earn free Bitcoin from their referral program.
6. Review Your ETH Purchase
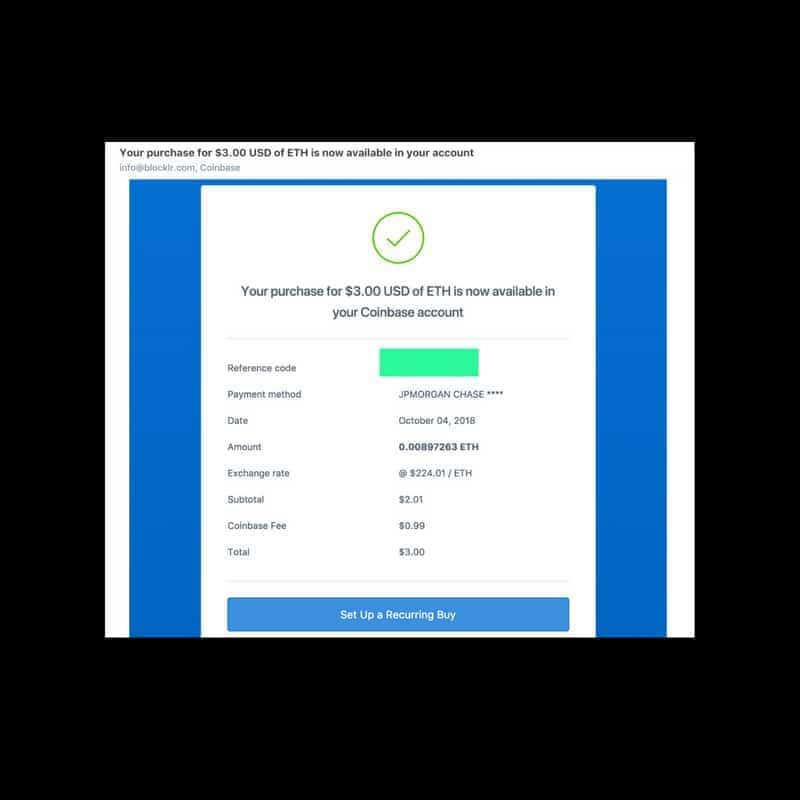
Once your email arrives, the process is complete. The email will outline all of your transaction details and provide you with a reference code. Save this email so you have a record of your transactions. Now you can view your portfolio on your dashboard and keep an eye on the status of your investments. Or, you can make more purchases by repeating these same steps.
How to Buy Ethereum: Additional Information
You are now the proud owner of Ethereum. Whether you want to sell, trade, invest more, or HODL is up to you. Now that you know how to buy Ethereum, here is some additional information. If you are curious about the cancelation of transactions, this is only possible if you have set a transaction to take place at a future date. Otherwise, once a transaction has been marked as either pending or complete, you will be unable to cancel it. Though, Coinbase is at liberty to cancel transactions if your account does not have sufficient funds.
Furthermore, it is advisable to transfer your cryptocurrency into your own cryptocurrency wallet rather than keep it in Coinbase’s hosted wallet. This will add an additional layer of security.


